Getting Started
Get qbee-connect installed and establish your first remote connection in under 5 minutes.
Installation
Install qbee-connect on your computer to begin managing secure remote connections to your Qbee.io devices.
System Requirements
| Platform | Minimum Version | Architecture |
|---|---|---|
| Windows | Windows 10 or later | x86_64 |
| Linux | Ubuntu 20.04 or equivalent | x86_64, arm64 |
| macOS | macOS 11 (Big Sur) or later | x86_64, Apple Silicon (arm64) |
Network Requirements
qbee-connect requires outbound network access to communicate with the Qbee.io platform.
| Requirement | Details |
|---|---|
| Protocol | HTTPS (TLS 1.2 or later) |
| Destination | Qbee.io API servers |
| Port | 443 (outbound) |
No inbound ports need to be opened. All connections are initiated outbound from qbee-connect.
Download
All releases are published on the GitHub Releases page. Download the package that matches your operating system and architecture.
Install
Windows
- Download the
.msiinstaller from the GitHub Releases page. - Double-click the downloaded
.msifile to launch the installer. - Follow the on-screen prompts to complete the installation.
- Once the installer finishes, qbee-connect is available from the Start menu.
Linux
Download the .deb or .rpm package from the GitHub Releases page, then install it with your package manager.
Debian / Ubuntu (.deb):
sudo dpkg -i qbee-connect_*.deb
Fedora / RHEL (.rpm):
sudo rpm -i qbee-connect-*.rpm
After installation, qbee-connect is available from your application launcher or by running qbee-connect in a terminal.
macOS
- Download the
.dmgfile from the GitHub Releases page. - Open the downloaded
.dmgfile. - Drag the qbee-connect icon into the Applications folder.
- Eject the disk image.
- Open qbee-connect from Applications or Launchpad.
Note
On first launch, macOS may display a security prompt because the app is downloaded from the internet. Click Open to proceed.
Verify the Installation
Launch qbee-connect from your application menu, Start menu, or terminal. The application's main window should appear, displaying a Log In button. This confirms that qbee-connect is installed correctly.
Establish Your First Connection
Prerequisites
- A Qbee account (Login / Register)
- qbee-connect installed on your computer
- At least one device in your inventory that is online
Connection Workflow
The first-connection workflow:
1. Launch qbee-connect from your application menu or terminal.
2. Click Log In in the main window and complete the OAuth2 browser authentication flow.
Note
For detailed authentication options (account switching, logout), see Managing Application → Authentication.
3. A dialog appears with a verification link and a user code. Click the link to open the Qbee.io authorization page in your browser. Enter the displayed user code and authorize access.
4. Return to qbee-connect. Once authentication completes, the device table loads automatically with your device inventory.
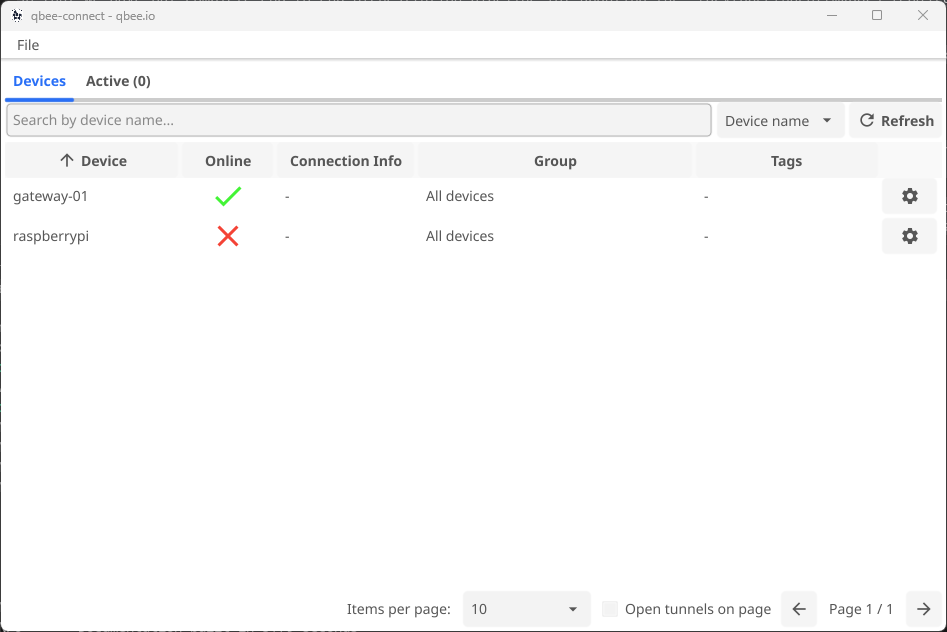
5. Find your target device in the device table. Use the search bar at the top to filter by device name if needed.
6. Click the settings icon (⚙) on the device row to open the connection configuration dialog.

7. Configure the connection. In the dialog, select SSH from the Type dropdown. This sets Remote Port to 22 and Protocol to tcp automatically.
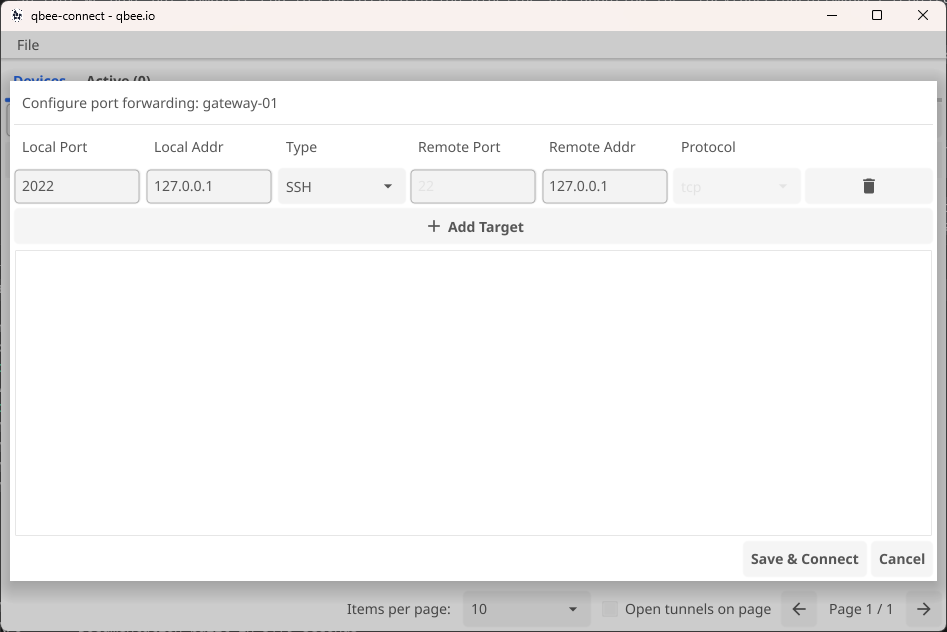
8. Click Save & Connect. The dialog closes and qbee-connect establishes the port-forwarding tunnel. The device table updates to show the active connection.

9. Click the Active (1) tab to view all active tunnels and their port mappings.
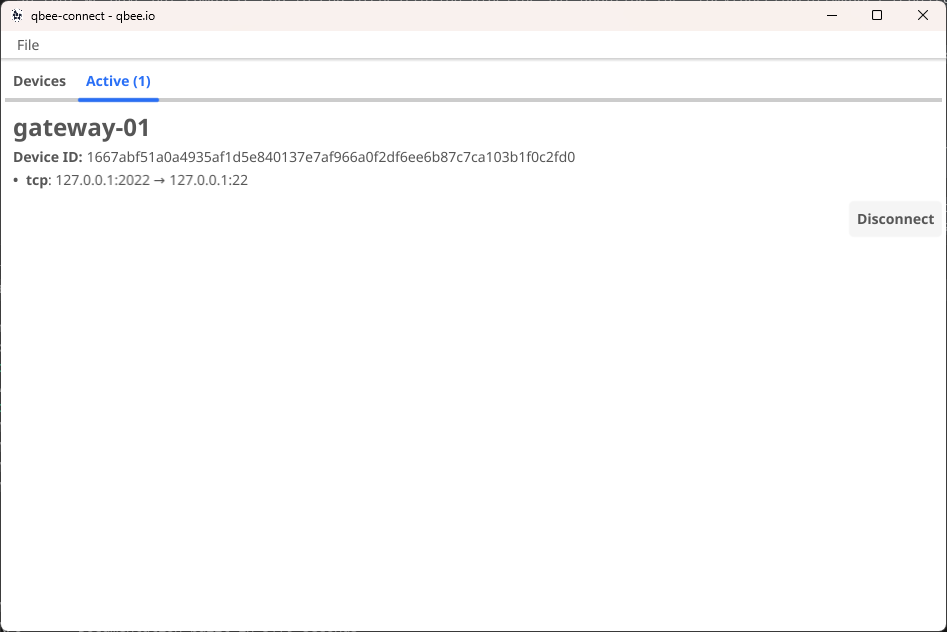
10. Connect via SSH. Open a terminal and connect using the local port shown in qbee-connect:
ssh -p <local-port> user@localhost
Replace <local-port> with the port number assigned by qbee-connect and user with your device's SSH username.
Congratulations!
You've established your first remote connection through qbee-connect. The SSH tunnel is now active, and you can interact with your remote device as if it were connected directly.
Upgrading
To upgrade qbee-connect to a newer version:
- Download the latest release from GitHub Releases
- Install following the platform-specific instructions above
Note
Your existing connections and credentials will be preserved during the upgrade.
See Also
| Intent | Document |
|---|---|
| Browse my devices | Devices & Connections → Finding Devices |
| Open a connection to a device | Devices & Connections → Creating Connections |
| Log in to qbee-connect | Managing the Application → Authentication |
| Use the system tray | Managing the Application → System Tray |
| Understand how tunneling works | Overview → How qbee-connect Works |
| Troubleshoot a connection issue | Troubleshooting |